

Start by taking a 8.5 x 11 piece of cardstock
and cut in half long ways-
so that you have (2) pieces that are: 4.25 x 11

Next SCORE your base cardstock in two places-
once at 5.5 from the top
and then 1.5 from the bottom-
fold on the score- then fold the 1.5 piece the opposite direction
this will create a "Z" looking piece of cardstock

Then EMBOSS the front side of the card with your cuttlebug

Now EMBELLISH~
I added pattern paper and ribbon
corner rounded the edges and used a scallop punch to embellish

Next APPLY thin red tacky tape- along both inside edges of the card
Then CREATE the inside library card style insert~
I cut mine 3.75 x 5.25
then rounded the edges- added some pattern paper
and Cricut die cuts with my sentiment in the center for the
finishing touches!

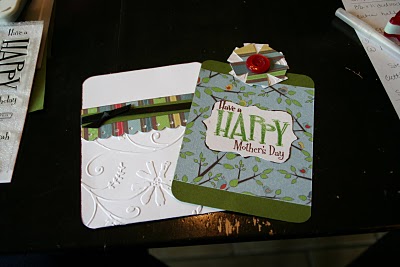
Finished Project!
SO CUTE!
Thanx Suzann for the great tutorial! Visit suzann's blog.