Calling ALL beginner Cuttlebug Users!

Welcome to the Cuttlebug Blog. We are excited you have stopped by to visit. So relax, kick off your shoes and enjoy your stay here. We have decided to dedicate this site to beginners! (Seasoned Veterans welcome too!) As I am a beginner Cuttlebug'er I have looked around other blogs and get kind of discouraged by all the very advanced (and fabulous) designs. So I thought to myself, beginners need a place to feel welcome, make mistakes (as I am sure I will ;) and grow with creativity! So lets join together and Create, Inspire , Teach, Grow!
Showing posts with label Love Language Embossing. Show all posts

Wednesday, June 16, 2010

Disney Scrapbooking Inspiration & Ideas

ASK and Ye Shall Recieve!  So a few posts back I asked you all what you would like to see here at the CBB! We had some great ideas that we are trying to get accomplished to share with you all.  In that post someone said they would like to see more Disney scrapbooking inspiration & Ideas. Today I want to start a project and have you all create it with me. I want to build a mural for my nephew and niece's room. Sounds like fun huh! So I started with the center piece and now I need you all to help decide what comes next!


Disney Scrapbooking inspiration & Ideas mural

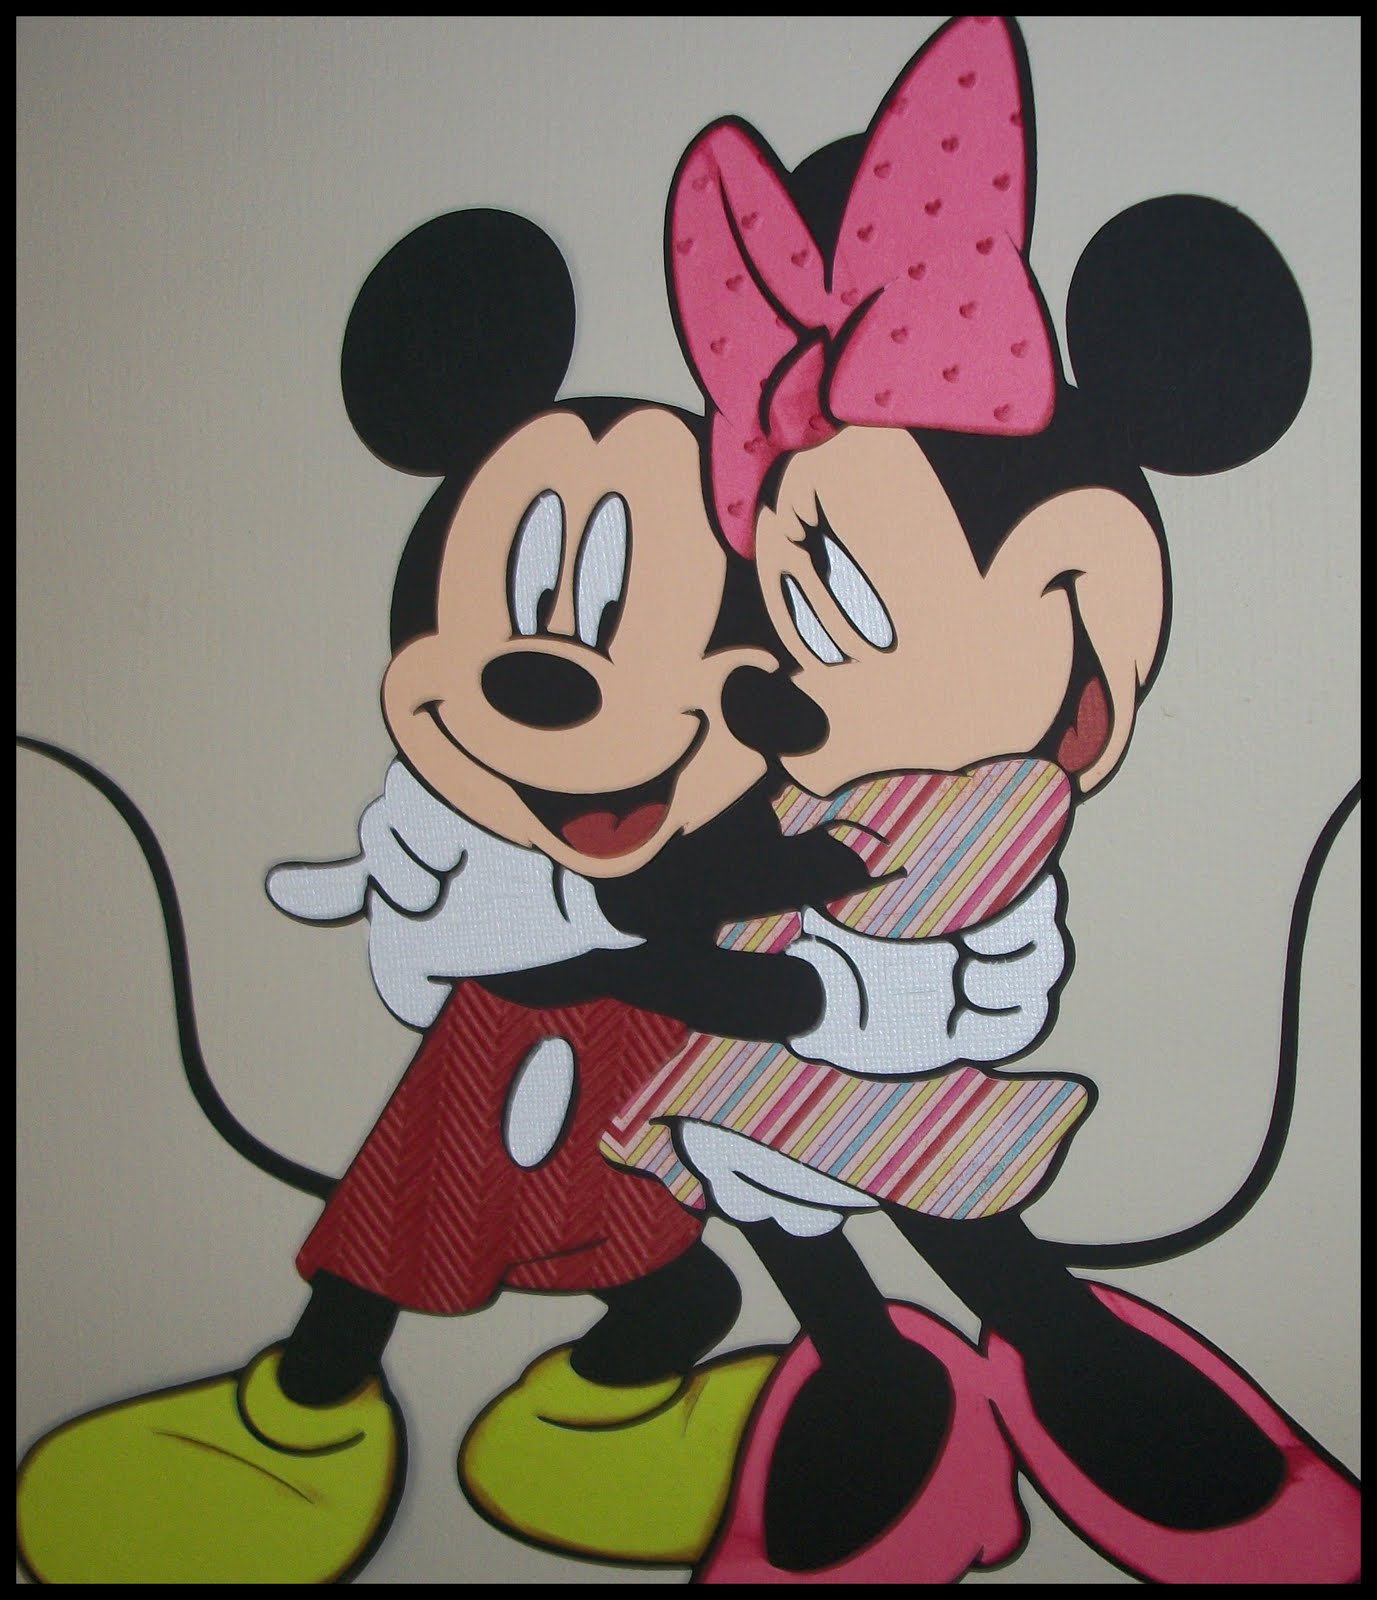
Click on the pics for more detail


So what do you think about my Disney Scrapbooking inspiration & Ideas? Cute start huh! I used Mickey and Friends Cricut Cartridge, Cuttlebug Herringbone embossing folder on Mickey and his star, and I used the Love Language embossing folder on Minnie and her heart! I cut them out at 10 Inches and the star and heart at 6!

Okay.... What should I do next? This is what I was thinking.... (oh... watch out this could be dangerous! *giggle*)
 I could do cuts of goofy, pluto, donald, daisy, car, house, tree, fence? I also have Pooh and friends with pooh, tigger, eyore, piglet, rabbit. And I have Tinkerbell cartridge. And I have Carz cricut cartridge.
So this is the problem... I don't know what to do next. Like I said I want it to be a Mural type project. So should I do ALL of the characters or just a couple from each cart? My my my what have I gotten myself into?  I Need your help... so don't leave me hangin'!
I will post about this mural project once a week so you can see how the project is coming along and how your suggestions have helped. (ahm.......if I get too excited about something... you may see 2 or 3 posts a week *wink*)

K everyone... I can't wait to hear what your ideas are... Have a great day.... and as always SCRAP CRAZY!

P.s. Just want to remind you we are only 44 away from 200 followers... then its prize time!
Also... CrazyScraps Blog is looking for 2 talented individuals to join their team.
And join in on our Challenge this month... great prizes up for grabs!

Tuesday, January 19, 2010

Challenges


Its all about PINK over at PTW. Which is great because I love pink. And over at Practical Scrappers its all about EMBOSSING. So I think this one covers both. Yay!
Here is a valentine I made! Enjoy, TFL


Recipe:
Cuttlebug Organic Flourish Embossing Border = top and bottom
Cuttlebug Love Language card making combo = xo's, hugs and kisses
Cricut Cartridge = Indy Art (lips)
Paper = Printed from PC Hug bug (*surprise ;), pale pink cs, dk pink polka dot
Ink = Martha Stewart (pink)
Embellies from stash

Monday, December 28, 2009

Stop and Smell the Flowers!


Since no one ever brings me flowers I thought I would make some for myself! It cheer'd me up! I love flowers! They're so pretty!

      Side View!

Recipe:
* Walk in My Garden Cricut Cartridge = Flowers, Stems, Vase
* Cuttlebug Embossing Folder (love language) = Flowers, (textile) = vase
* Ink it up ink (black) = Vase
* Color box chalk (chestnut roan) = Flowers
* doodlebug design inc.(bright assort) = jewels
* Cardstock = bazzill bling (vase), yellow, pink, purple, 3 different greens (stems)
* Puffy adhesive squares
I cut the vase out at 5" then used textile embossing folder and while it was still in folder I used black ink to bring out the design. Note: apply softly, trying to only bring out design
I then cut the flowers and stems ranging from 3" to 1.5" and different colors, then I used love language embossing folder on them, again while still in the folder I used chestnut roan and lightly applied to bring out heart design. I then arranged the flowers how I liked and glued! I used puffy squares to add some depth.
TYFL! Enjoy!

Hello Princess!

Hey All! So I got a Cuttlebug for Christmas this year... I have wanted one FOREVER! I also got Hello Kitty Cricut Cartridge (and home accents) so here is a layout to start off the Cuttlebug Blog!

Recipe:
*Hello Kitty Cartridge = Kitty, letters & flowers
*Home Accents Cartridge = embelishment top left
*Cuttlebug (love language) embossing folder = picture mat & "Hello" letters
*Cardstock = white, black, yellow, purple, pink
*Misc paper = page
*Studio g ink (purple) = flowers, edge of page
*Ink it up ink (black) = edge of page
TYFL, and Happy Embossing!